CANVAS - Quick Tips for Students: PowerPoint, Video & Audio
How to use Kaltura for Canvas Assignments
To get started using Kaltura, you will first need to make sure you have Kaltura Capture installed on your computer. To download the Kaltura Capture tool, go to Account on the gray navigation bar in Canvas, and then select My Media from the menu:

Once you've opened My Media, you will see your personal media channel. This houses all of the media you've made using Kaltura. If you've never used the Kaltura Capture tool before, this section might be empty, and that's okay! You can download the Kaltura Capture tool by clicking the blue Add New button and selecting Kaltura Capture:

Note: You can also upload existing video and/or audio files to your My Media using the Media Upload option.
Once you've selected Kaltura Capture, you will be prompted to download the application. You can select either Windows or Mac:

Note: If you've already installed Kaltura Capture on your computer, clicking the Kaltura Capture button will launch the application automatically.
Once you've installed Kaltura Capture, you'll be able to begin recording. When the application launches, you'll see all of your different recording options on the Kaltura recorder, depending on what devices you have enabled:

By default, you'll see a camera icon, screen icon, and microphone icon. If the button is grayed out with a line through it, that means that particular tool is turned off. If the icon is blue, you'll be able to select which output to use (if you have more than one). When you record your computer screen, you can also indicate whether you want to record a full screen or only a specific area on the screen.
When you're ready to start your recording, click on the big red button. You'll get a three second countdown before your recording officially begins. The recorder will minimize to the bottom right of your screen, and you'll see a few different options on the recorder:

At any point, you can pause the recording by clicking on the red button. This will keep your video/audio in tact but give you time to advance a slide or catch your breath. When you click the red button again, the recording will immediately start, and you will not get the same three second countdown you had initially. All the way to the right of the recorder, there's a pencil icon. This allows you to annotate directly on your computer screen.
The gray X icon deletes your recording immediately, and the gray square icon is how to stop the recording to either save it or delete it once you've reviewed it. Once you've stopped your recording, a new preview window will launch in Kaltura:

You'll see the default title of your media (the generic name and date/time of recording) as well as a preview of the full video/audio. Give the media a new, more specific title, and then you can either hit Delete to remove it from your media library, Save to store the video in Kaltura on your desktop for a later upload, or Save & Upload to send the video to your My Media in Canvas. (To submit the video in Canvas, you will need to use Save & Upload so the video is stored in My Media.)
Depending on the length of your media, it may take a little while for the content to appear back in Canvas under your My Media page, but it will appear at the top once it's done processing:

If you want to edit your uploaded media, you can do that by clicking on the title of whatever media you want to edit. This will let you rename the content, trim it, and more.
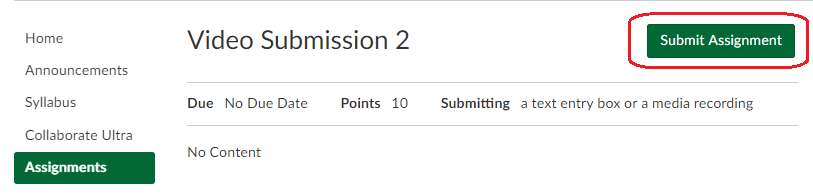
Once you're satisfied with your media, it's time to submit the file in Canvas. Navigate to your assignment. You'll notice that the Assignment Type says "a text entry box" and that's because you need access to the Canvas rich text editor to submit your Kaltura file:

Once you click Submit Assignment the rich text editor will open. Next, navigate to the blue v icon called More External Tools.

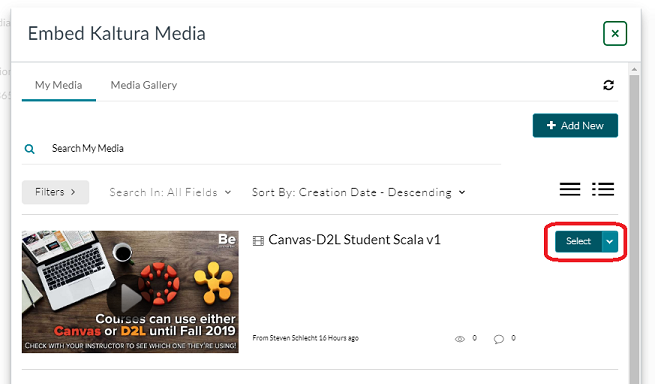
After you click on More External Tools, you'll see an option called My Media. Click on that button to bring up your Kaltura My Media:

Next to each video, you'll see a blue </> Embed button. Clicking that button will embed the media file of your choice into the Canvas rich text editor:

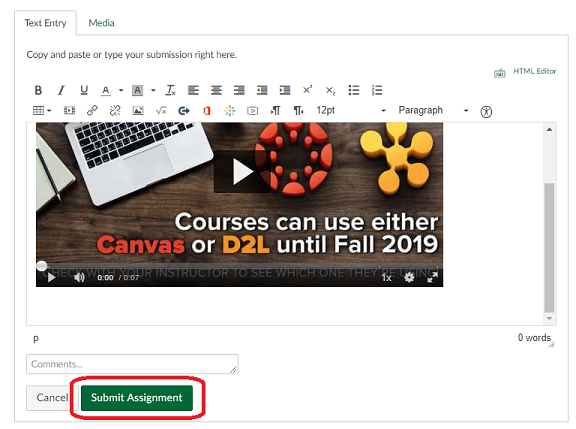
Once your media is embedded, you'll be taken back to the rich text editor, and the content will appear embedded on the Canvas page:

After your media has been embedded, feel free to add any additional comments or assignment requirements within the rich text editor, and then click the green Submit Assignment button to submit your work.
How to Submit a Video or Audio Assignment
Submitting an Embedded Kaltura Media File via Text Entry
2. The submission box should be on the Text Entry tab by default. Click the More... icon on the right side of the text box toolbar.

3. Select the Apps plug icon and select My Media. You may have to click View All to locate it.

5. After the video/audio player pops into the text box, click Submit Assignment below it.
Download & Submit Kaltura Recording as a Media File into an Assignment Dropbox
Note: if you have the option between embedding it (as shown above) or directly uploading your media (shown below), you should stick with the embed method from above. Small files are okay for direct upload, but you'll want to use Kaltura for videos and long audio clips since you have limited Canvas file space while Kaltura has essentially no storage limit.
1. Open the assignment you wish to submit and click on the Submit Assignment button on the upper right.
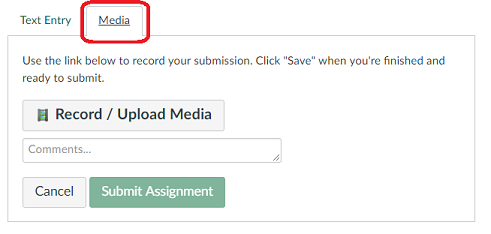
9. Click on Record/Upload Media. When the popup window appears, select the Upload Media tab.
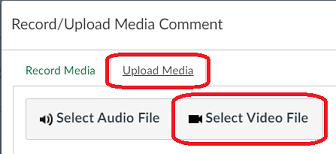
10. Click Select Video File or Select Audio File to locate the media file you want to upload.

How to Record a PowerPoint Presentation with Kaltura Capture
When you record a slide presentation the Kaltura application uploads the slides as chapters and indexes the text so it can be searched for in the video. When recording slides, PowerPoint must be in Slide Show mode.
Follow these steps to set your screen settings for recording a presentation:
- Navigate to the UW-Parkside Logins webpage.

- Click on the Kaltura MediaSpace link.

- Select Guest > Login using your UW-Parkside Username and Password.

- Click on Add New > Kaltura Capture.

(How to download and install Kaltura Capture) - Use the drop-down menu beneath the screen icon to select which will display the PowerPoint deck.

- Use the drop-down menu beneath the mic icon to select your audio source.

- Use the drop-down beneath the camera icon to select or mute the webcam source.

- Click the screen, mic or webcam icons if you want to mute any source for your recording.

- Open your PowerPoint presentation.
- Select the red Record button on Capture recorder.

- Select the Slide Show tab from the PowerPoint menu.
- Select From Beginning from the PowerPoint Slide Show tab to begin your presentation.

- Narrate your slides, using the keyboard arrow or tab keys to advance your slides.
- Once you’ve finished narrating your slide deck, select the Stop button on the Capture recorder or select Ctrl+Shift+S to stop the recording and select Yes, Stop it.
- Exit your PowerPoint presentation by selecting the Esc button on your keyboard.
- The Capture recorder should now display a preview of the recording stored on your device.
- Preview your recording by selecting the Play icon beneath the video display.
- Name your video, add a description and use tags to make your video more searchable.
- Select Save and Upload to store your recording safely in your Kaltura My Media.
How to Export a PowerPoint Presentation as a Video
To Export a PowerPoint file as a Video:
1. Click on File.

2. From the File menu > select Export.
3. Choose the desired file size. Note: Standard (480p) is the smallest file size.
4. Click Create Video.

See also: